How to Use the Campaign Results in Act! E-Marketing to Get New Leads
Swiftpage bought Act! in 2013 and integrated a new e-mail marketing tool called Act! E-Marketing (AEM). Unlike other CRM systems, Act! offers a unique integration between campaigns and leads generated from it.
As shown in this video, I sent an offer to upgrade Act!. The results are shown within Act!. Just click a name, and it goes right to the lead with history ready to go for the rep.
Act! Dialog Boxes Are Wrong Size
Sometimes, the Act! dialog boxes don’t appear correct, and the boxes are out of scale relative to the screen. This is because you need to change the text scaling to 100% DPI from 125%+. Yes, it makes other icons relatively small, but it’s a flaw in legacy code from Act! for Windows that hasn’t been migrated yet.
Follow the video below, and you will need to log out and log back into Windows.

Attaching Dropbox and Google Docs to Act! Contacts
Since Ac! v17, offers the ability to attach links to websites in the documents tab. As online file sharing tools grow like Google Docs, Dropbox, Box and Sharepoint, you can attach these links to Act! contact records. This video shows you how.
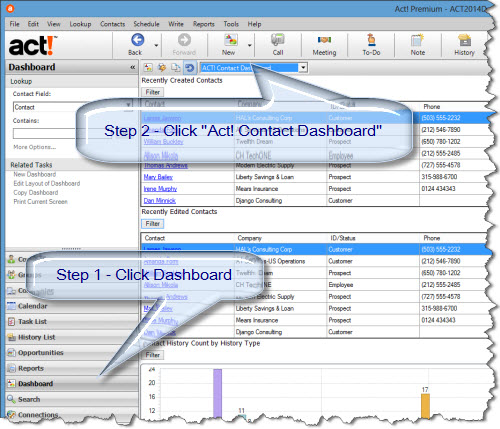
Act! Dashboard - Find New Contacts in Two Clicks
For Act! 2010+ users, the dashboard offers a visual reporting tool. One client wanted to know whether sales reps where adding new leads or making changes. With Act! dashboard, it's two clicks away.
How to Create Company Records with Act!
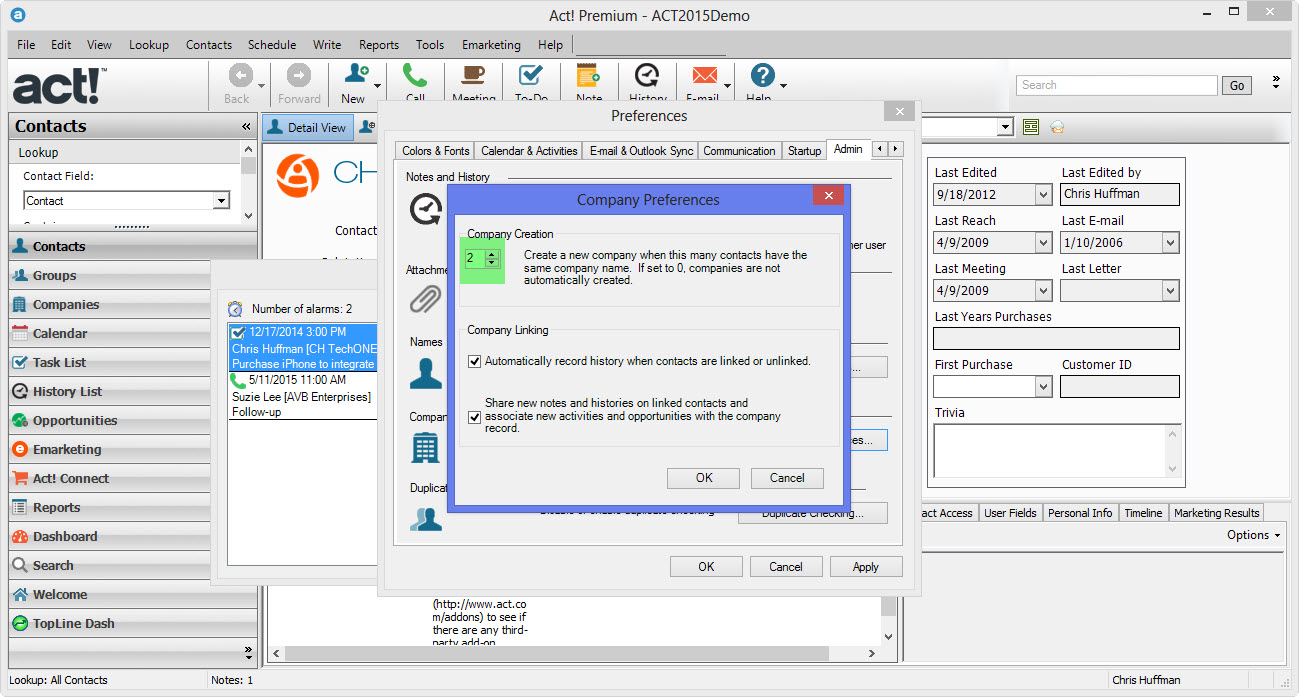 If you want to manage multiple contacts at one company, Act! uses a company record feature.
For Act! v16+, you can automate company record creation by going to Tools -> Preferences -> Admin -> Company Preferences and change the threshold from 0 -> 2+. Legacy owners of Act! can look at this app to automatically convert contacts to companies.
The embedded guide shows you how to manage company records and helps manage existing contacts from Act! version 2010+
Our method uses the "linked contacts" method to connect contacts to companies, so you when you find additional contacts at the same company, select Contact -> Duplicate Contact and everything stays together as expected.